Build a CI/CD pipeline
This tutorial provides step-by-step instructions to build a CI/CD pipeline using GitHub Actions to validate and deploy a Snoweaver project.
Prerequisites
Before continuing with this tutorial, ensure you have completed the following prerequisites:
Ensure Git is installed and available on your client machine.
Set up Snowflake resources for this tutorial
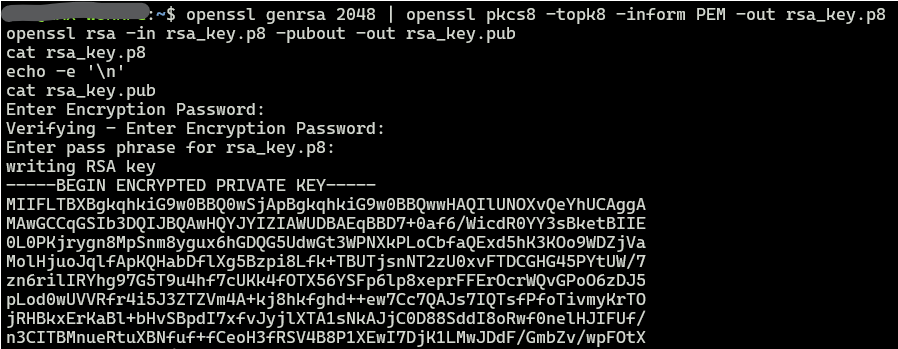
Launch a command-line terminal (Linux, macOS) or Git Bash (Windows) on your client machine and execute the following commands to generate a key pair. You will be prompted three times to provide a passphrase for decrypting the key.
openssl genrsa 2048 | openssl pkcs8 -topk8 -inform PEM -out rsa_key.p8
openssl rsa -in rsa_key.p8 -pubout -out rsa_key.pub
echo -e '\nPrivate Key:\n'
cat rsa_key.p8
echo -e '\nPublic Key:\n'
sed '1d;$d' rsa_key.pub | tr -d '\n'
echo -e '\n'
Please make a note of the values for the key pair and passphrase for future reference.
Open a Snowflake worksheet and run the following statements with a role that has the required privileges. You may use the AccountAdmin role if working in a sandbox environment:
--create a service account user for GitHub
CREATE USER IF NOT EXISTS S_GITHUB_LEARN_NON_PROD RSA_PUBLIC_KEY='<your public key>';
CREATE ROLE IF NOT EXISTS S_GITHUB_LEARN_NON_PROD;
GRANT ROLE S_GITHUB_LEARN_NON_PROD TO USER S_GITHUB_LEARN_NON_PROD;
GRANT USAGE ON WAREHOUSE LEARN_SW_WH TO ROLE S_GITHUB_LEARN_NON_PROD;
Note
To streamline this tutorial, we will create a single service user to access both the VAL and TST environments in Snoweaver, rather than setting up dedicated users for each.
Execute the following statements with the owner role of Snoweaver or a custom role with the SNOWEAVER.APP_ADMIN application role.
-- Create the LERAN_VAL project, which will serve as the environment for pre-merge validation and testing of the source code.
CALL SNOWEAVER.ADMIN.SAVE_PROJECT('LEARN_VAL','
secrets:
- sfdc_learn_dev_oauth_access_token
external_integrations:
- sfdc_learn_dev_access_integration
');

-- Grant the GitHub service role access to the project.
GRANT APPLICATION ROLE SNOWEAVER.LEARN_VAL_DEVELOPER TO ROLE S_GITHUB_LEARN_NON_PROD;
Execute the following statements with a role that has the required privileges to configure a new Salesforce connection in the test environment.
-- Create a new OAuth integration for TEST
CREATE OR REPLACE SECURITY INTEGRATION SFDC_LEARN_TEST_OAUTH_CLIENT
TYPE = API_AUTHENTICATION
AUTH_TYPE = OAUTH2
OAUTH_CLIENT_ID = '<your sfdc client id>'
OAUTH_CLIENT_SECRET = '<your sfdc client secret>'
OAUTH_TOKEN_ENDPOINT = 'https://login.salesforce.com/services/oauth2/token'
OAUTH_ALLOWED_SCOPES = ('api id refresh_token')
OAUTH_ACCESS_TOKEN_VALIDITY = 3600
ENABLED = TRUE;

-- Provide access to the application.
GRANT USAGE ON INTEGRATION SFDC_LEARN_TEST_OAUTH_CLIENT TO APPLICATION SNOWEAVER;

USE SCHEMA SNOWEAVER.ADMIN;

-- Register the new integration with Snoweaver
CALL REGISTER_OAUTH_INTEGRATION('sfdc_learn_test_oauth_client');

-- Create a new secret for TEST
CALL SAVE_SECRET('sfdc_learn_test_oauth_access_token','
type: oauth2
api_name: sfdc_learn_test_oauth_client
refresh_token: <your sfdc refresh token>
oauth_scopes:
- api id refresh_token
');

-- Create a new external integration for TEST
CREATE OR REPLACE EXTERNAL ACCESS INTEGRATION SFDC_LEARN_TEST_ACCESS_INTEGRATION
ALLOWED_NETWORK_RULES = (SNOWEAVER.ADMIN.SFDC_ACCESS_RULE)
ALLOWED_AUTHENTICATION_SECRETS = (SNOWEAVER.ADMIN.SFDC_LEARN_TEST_OAUTH_ACCESS_TOKEN)
ENABLED = TRUE;

-- Provide access to the application.
GRANT USAGE ON INTEGRATION SFDC_LEARN_TEST_ACCESS_INTEGRATION TO APPLICATION SNOWEAVER;

-- Register the new integration with Snoweaver
CALL REGISTER_EXTERNAL_INTEGRATION('sfdc_learn_test_access_integration');
Note
To streamline this tutorial, we’ll use the existing Salesforce environment to simulate our TEST environment and apply the same OAuth client credentials for the test connection.
Execute the following statements to create a new project named LEARN_TST, which will serve as the target environment for deploying our project build.
-- Create the LERAN_TST project
CALL SNOWEAVER.ADMIN.SAVE_PROJECT('LEARN_TST','
secrets:
- sfdc_learn_test_oauth_access_token
external_integrations:
- sfdc_learn_test_access_integration
');

-- Provide access to the GitHub service role.
GRANT APPLICATION ROLE SNOWEAVER.LEARN_TST_DEVELOPER TO ROLE S_GITHUB_LEARN_NON_PROD;
Import the tutorial repository
Sign up for a free GitHub account if you don’t already have an account.
Open the Import your project to GitHub page.
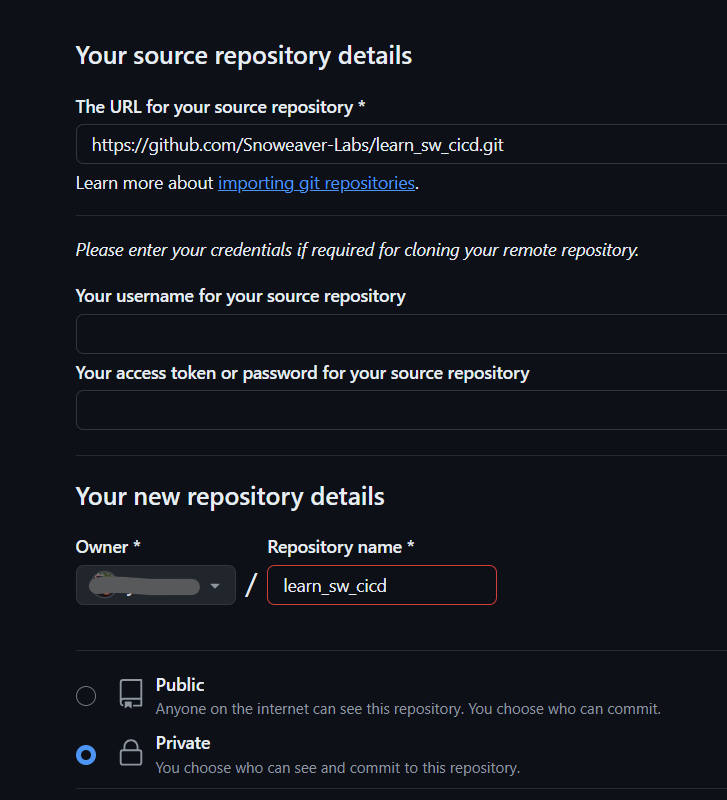
Import the following repository into your account. You may leave the username and password fields blank.
https://github.com/Snoweaver-Labs/learn_sw_cicd.git
Please allow 1 to 2 minutes for the import process to complete.
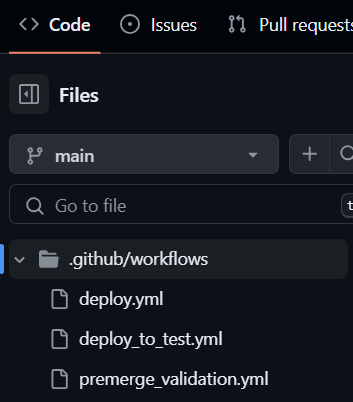
Open the repository and navigate to the .github/workflows/ directory on the Code page. This tutorial will use three GitHub Actions configuration files:
deploy.yml This reusable workflow automates the deployment of the project build to the target environment. It includes the following steps:
Install Snowsql Cli
Install Snoweaver Cli
Purge the CODE stage in the target environment and upload resource files.
Clear all data in the target environment and import resource files from CODE
Build instances for all jobs in the target environment
premerge_validation.yml This workflow triggers the deploy workflow to deploy the build to LEARN_VAL, then validates the components and the test results of the sample job deployed.
deploy_to_test.yml This workflow triggers the deploy workflow to deploy the build to LEARN_TST.
Note
If your Snowflake instance has IP whitelisting enabled or is protected by a corporate firewall with a private link connection, you’ll need to set up a self-hosted runner on GitHub.
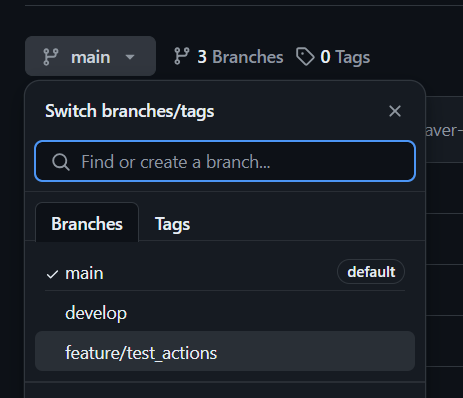
Switch to the feature/test_actions branch.
Open config_LEARN_VAL.yaml and click Edit this file as shown below:
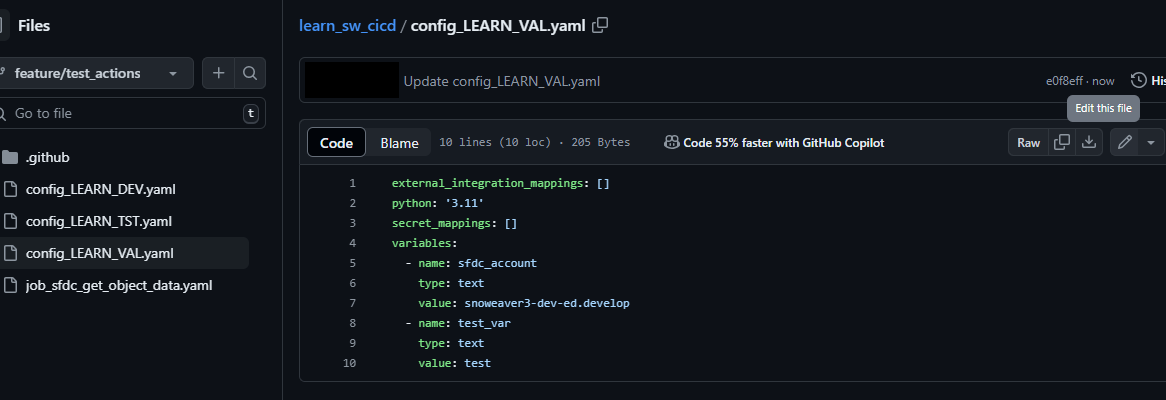
Update the sfdc_account variable with your Salesforce account details:
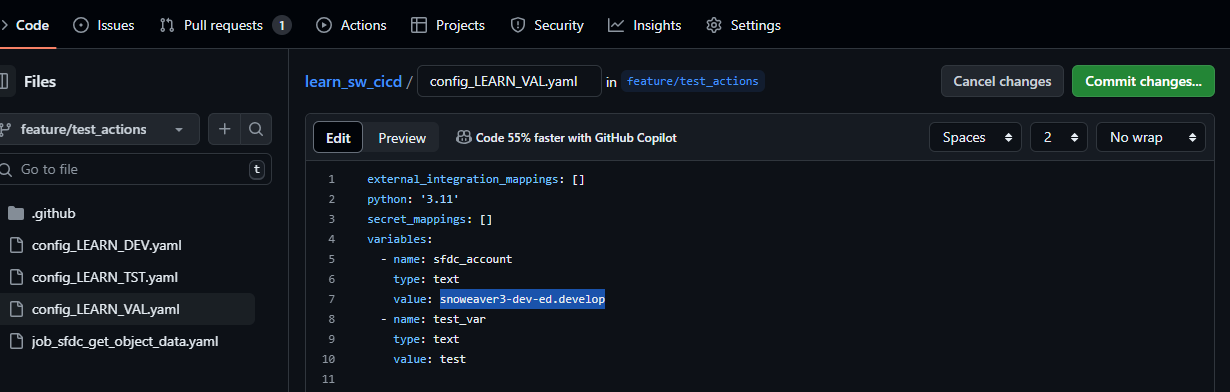
Click Commit changes to save the file.
Follow the same steps to update config_LEARN_TST.yaml.
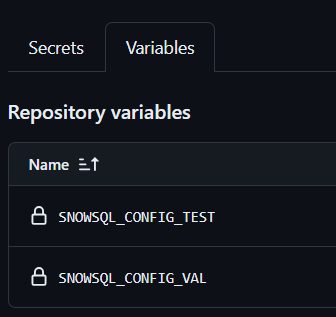
Go to the Settings tab and proceed to Security > Secrets and Variables > Actions.
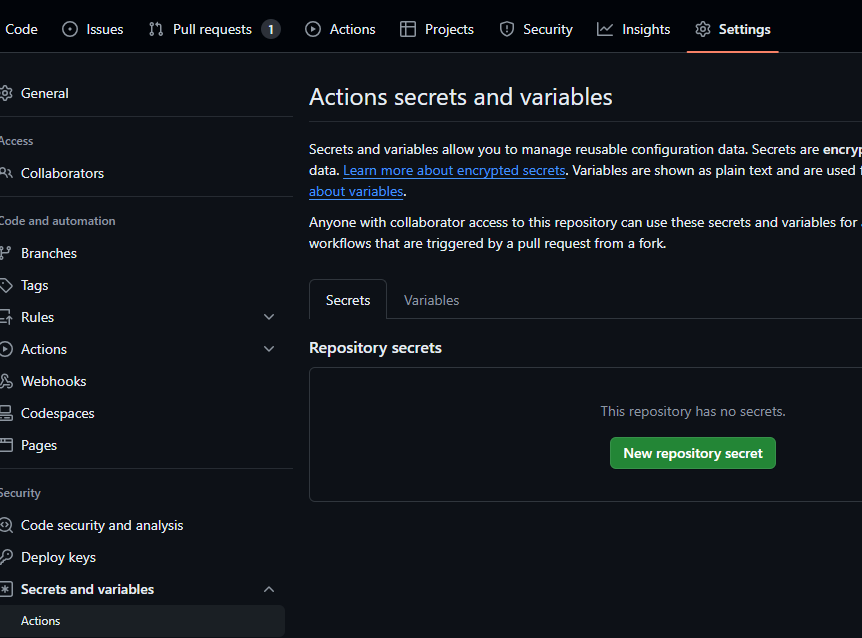
Create the following secrets for this repository.
SNFLK_PRIVATE_KEY_NON_PROD:               <your private key>
SNFLK_PRIVATE_KEY_PASSPHRASE_NON_PROD:    <your key passphrase>

Note
Please enter the private key value exactly as it appears, including the delimiter lines, without any modifications.
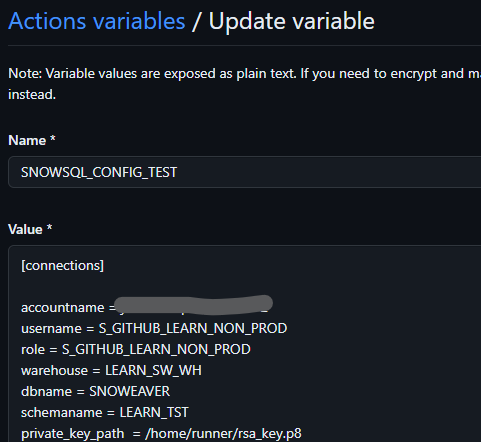
Define the following variables using the template.
SNOWSQL_CONFIG_TEST:
   template.accountname = <your Snowflake account>
   template.schemaname = LEARN_TST

SNOWSQL_CONFIG_VAL:
   template.accountname = <your Snowflake account>
   template.schemaname = LEARN_VAL
Template:
[connections]

accountname = <your Snowflake account>
username = S_GITHUB_LEARN_NON_PROD
role = S_GITHUB_LEARN_NON_PROD
warehouse = LEARN_SW_WH
dbname = SNOWEAVER
schemaname = <LEARN_[TST|VAL]>
private_key_path  = /home/runner/rsa_key.p8

[variables]

[options]
auto_completion = True
log_file = ~/.snowsql/log
log_level = INFO
timing = True
output_format = psql
key_bindings = emacs
repository_base_url = https://sfc-repo.snowflakecomputing.com/snowsql
variable_substitution = True
exit_on_error = True
Trigger the CI/CD pipeline
Navigate to the Pull requests tab and create a New pull request with the following configuration:
base:    develop
compare: feature/test_actions
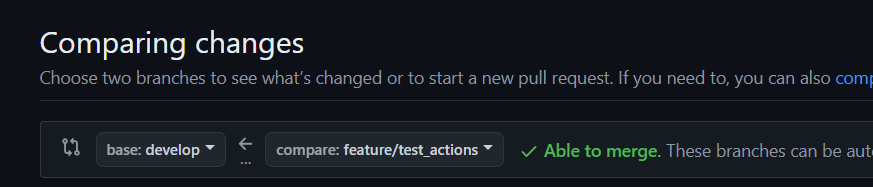
Click Create pull request
On the subsequent page, actions will automatically trigger within a few seconds to validate the build.
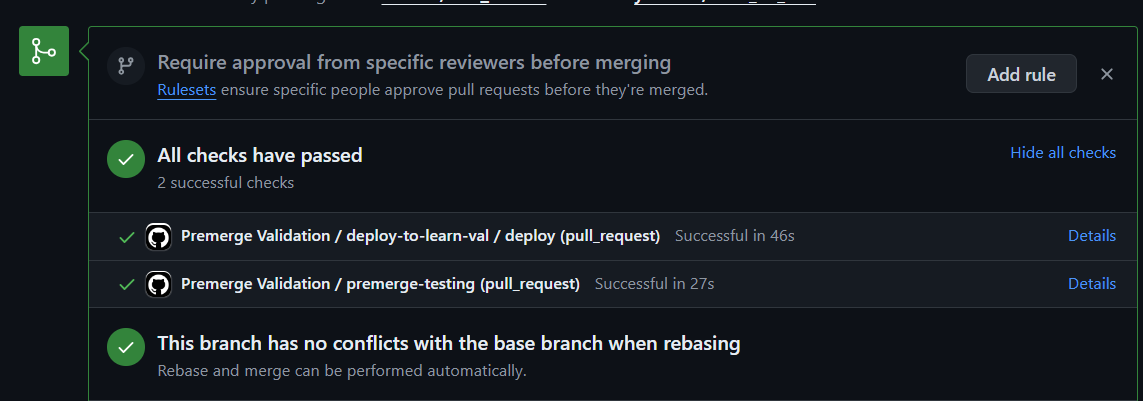
Wait for all checks to complete successfully, then click Merge pull request.
The changes have now been merged into the develop branch. We will proceed to merge these changes into the main branch.
Create another pull request with the following configuration:
base:    main
compare: develop
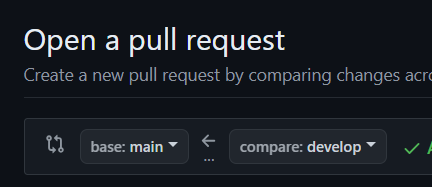
Click Merge pull request to merge the changes into the main branch.
Note
To streamline this tutorial, we have not set up any pre-merge checks in this tutorial. You may choose to implement integration testing actions here if needed.
Navigate to the Actions tab and select Deploy to Non-Prod Envs from the side menu.
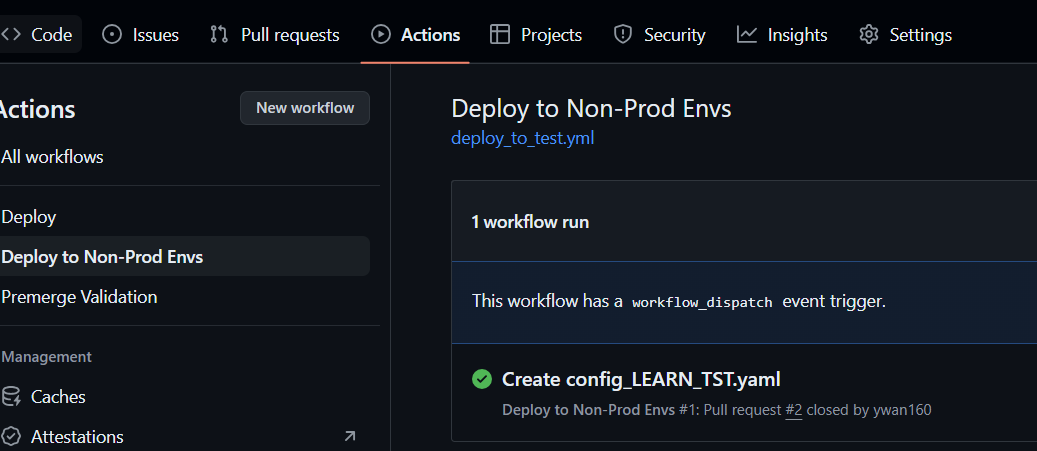
An action should be triggered to automatically deploy the build to the LEARN_TST project.
Wait for the deployment process to complete.
Review the LEARN_TST project
Access the LEARN_TST project in Snoweaver using the AccountAdmin role, as a custom role for test access has not been configured.
You can review the mappings as defined in the LEARN_TST.yaml file.

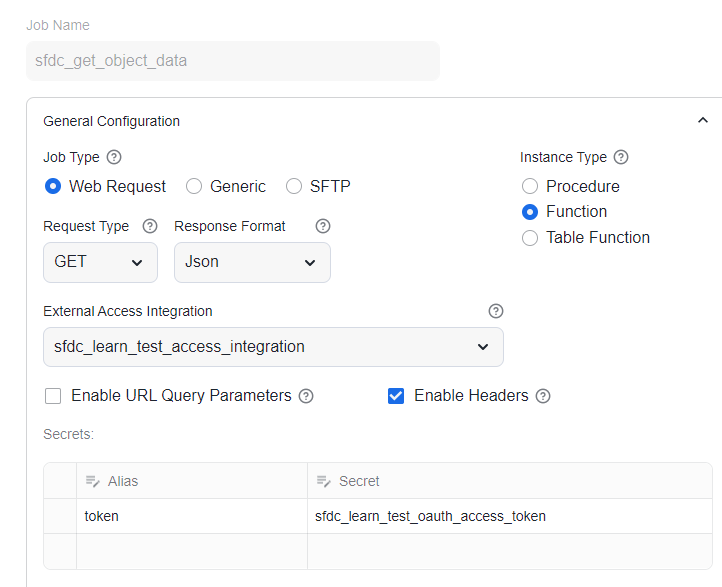
Open the job sfdc_get_object_data, and you can see that the external access integration and the secret have been updated while the job was imported into the project.