Tutorial: Create and configure a new Project
This tutorial provides step-by-step instructions to create and configure a new project.
Prerequisites
Before continuing with this tutorial, ensure you have completed the following prerequisites:
If you don’t already have a Sandbox environment with full control, we recommend signing up for a free Snowflake account to complete the tutorials. Snowflake Free Trail.
Note
External access is not supported for trial accounts, which is necessary to complete the tutorials. To enable this feature, please submit a case to Snowflake support through the UI.
Alternatively, you can provide a credit card to convert it to a paid account without ending the trial period. During the remainder of the trial period, you can continue using your free credits until the balance is exhausted.
Once you have your Sandbox account ready, install Snoweaver from the Snowflake Marketplace.
Note
To experience the Copilot feature, we recommend creating an account in the AWS US West (Oregon) region, which offers the latest language models.
Create a new project
Launch Snoweaver and navigate to the Admin console via the top menu.
Note
When launching Snoweaver for the first time, you must initialize the Admin API. This initialization process takes approximately 30 seconds to complete.
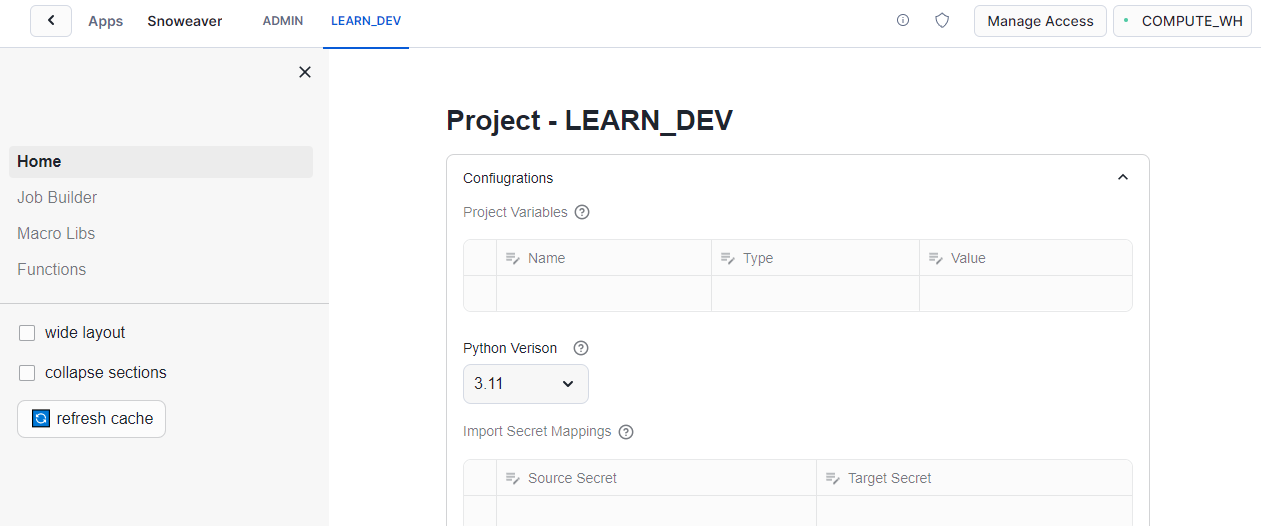
Open the Projects page.
Update the Name field to LEARN_DEV and click Save.

Refresh your browser session by pressing F5 or ⌘ + R. The newly created project should now be visible in the top menu.
Open the new project to ensure it was created correctly.
Create Snowflake resouces
Open a Snowflake worksheet and execute the following SQL statements using a role with the necessary privileges. If you are working in a sandbox environment, you may use the AccountAdmin role or an equivalent role:
-- Set up a sandbox environment for the tutorials.
CREATE DATABASE IF NOT EXISTS LEARN_SW;
CREATE SCHEMA IF NOT EXISTS LEARN_SW.DEV;
CREATE WAREHOUSE IF NOT EXISTS LEARN_SW_WH WAREHOUSE_SIZE =XSMALL AUTO_SUSPEND =60;

-- Define a custom role and assign the required privileges.
CREATE ROLE IF NOT EXISTS LEARN_DEV_DEVELOPER;
GRANT USAGE ON WAREHOUSE LEARN_SW_WH TO ROLE LEARN_DEV_DEVELOPER;
GRANT ALL PRIVILEGES ON SCHEMA LEARN_SW.DEV TO ROLE LEARN_DEV_DEVELOPER;
GRANT EXECUTE TASK ON ACCOUNT TO ROLE LEARN_DEV_DEVELOPER;
GRANT USAGE ON SCHEMA LEARN_SW.DEV TO ROLE LEARN_DEV_DEVELOPER;
GRANT USAGE ON DATABASE LEARN_SW TO ROLE LEARN_DEV_DEVELOPER;
GRANT APPLICATION ROLE SNOWEAVER.LEARN_DEV_DEVELOPER TO ROLE LEARN_DEV_DEVELOPER;

-- Assign this custom role to your user account.
GRANT ROLE LEARN_DEV_DEVELOPER TO USER <Your User Account>;
Switch to the LEARN_DEV_DEVELOPER role.

This role grants you access to the resources associated with the LEARN_DEV project within the Snoweaver database.
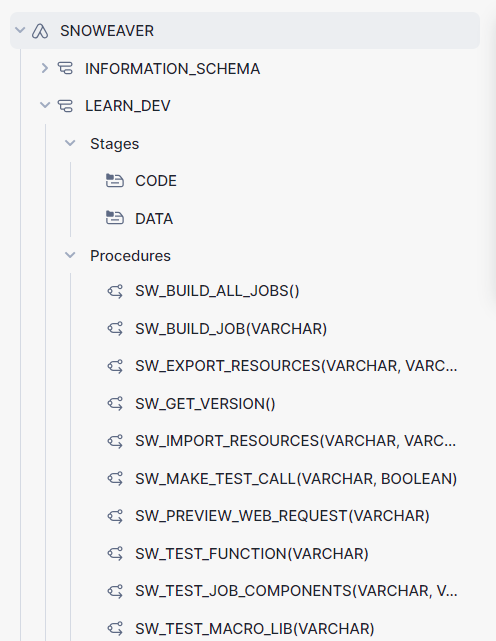
Open the Snoweaver application. You will be able to see only the LEARN_DEV project, and the Admin console will no longer be accessible.
